Implant Case Study

A Sample Complex Implant Case | True Case completed by Gibson Dental Designs

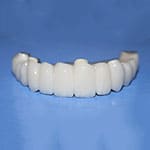
More and more patients are requesting full restorative implant work. Although these cases are not common, they are complex, and demand experience and expertise.  You may be interested in the below series of pictures that outlines this true case and the step by step procedures taken to complete this full arch implant restoration.

#1 A polyvinyl impression with impression posts in place.
#2 Shows model analogs in place in soft tissue.
#3 Model has been poured and abutments shown in place.

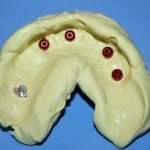
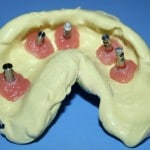
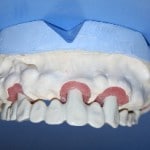
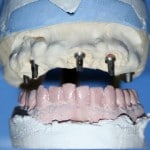
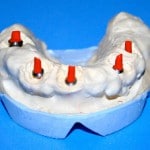
At this point decisions would have been made regarding cuff height of abutments and whether to use straight or angled abutments. For this case, due to the angle of the implants, the 3 anterior abutments were chosen at a 15° angle and the posteriors were straight.

#4 Beginning of articulation.
#5 Die spacer has been added for the cement gap.
#6 Abutments have been dipped and trimmed for proper marginal integrity.
#7 Shows the initial wax-up with RPS pontics in place.
#8 Is the finished framework ready for opaque shading.

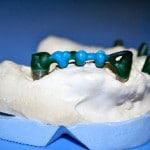
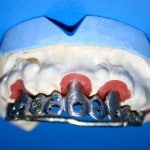
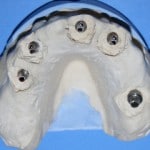
You will notice two keys features that Gibson Dental uses to ensure the bridge will fit correctly and the to be applied porcelain will not shear off the metal substructure. The first feature is a connecting bar in the posterior region to stabilize the frame during porcelain firings. The second feature you see are holes through the metal substructure to allow porcelain to wrap the metal and allow for more even cooling of the metal and porcelain to create less stress.

#9 The metal substructure with opaque and ready for porcelain application.
#10 The first firing of dentin modifiers, with opaque dentin in the pontic areas overlapping with dentin, and showing the mammelon development built-in.
#11 The second firing will seal any tears and will bring pontics down to the ridge surface.
#12 The final firing of the incisals to complete the case.
#13 Final glaze application and the bridge seating on the master model, with soft tissue in place.
#14 The bridge ready for sectioning out the stability bar, sandblasting and the polishing of exposed metal work.
#15 The bridge ready for insertion.

LARGE ENOUGH TO SERVE YOU PROFESSIONALLY.
SMALL ENOUGH TO SERVE YOU PERSONALLY.